More precision for your project!
METROLOGY SERVICES & ENGINEERING FROM ONE SINGLE SOURCE.
In today's technical environment, the precise measurement of plant and production equipment has become an industry standard - and rightly so. Because optimally aligned machines are the prerequisite for minimal wear, efficient production processes and greater safety against failure.
How does it look in action? In order to give you an insight into the application of our laser measurement, we have prepared one of our projects with a European customer for you as a vivid case study. Just fill in the following fields and we will send you the PDF document immediately and free of charge to your e-mail address.
At Metalock, we now offer you both the metrology services and – if necessary – the subsequent machining or repair work of your plant machinery, conveniently from one single source. With this integrated solution, we simplify the project process for you, increase the efficiency of the machining process and provide you with precise documentation. In addition, the wear status of machines can be timely recorded by means of regular surveys and potential defects remedied early on.
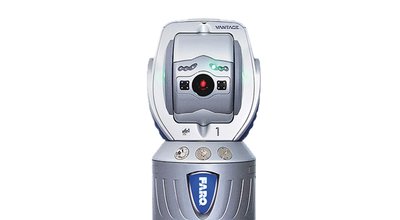
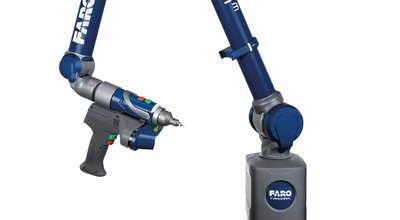
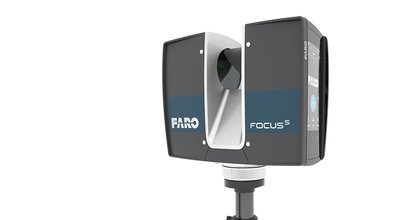
Whether during the machining or repair of a system, to prevent wear and tear or in the case of customized retrofitting of machines – with our three measuring devices, the Laser Tracker, the Laser Scan Arm and the Laser Scanner, we implement versatile measuring tasks for you.
You need a system measurement with subsequent processing? You want to determine the degree of wear of your components? Describe briefly your concerns and we will send you an offer without obligation.
Machining and metrology by one single service provider – you benefit from clear communication channels and responsibilities, high quality assurance and positive cost effects.
Our metrology services follow highest standards. Our measuring equipment is recertified every year and used exclusively by experienced engineers.
On the basis of our measurement results, we provide you with a comprehensive and detailed documentation of the machining task we performed. This exact reference makes it easier for you to plan and evaluate future projects.
Whether for preparation, as control during the machining process or as a reference for future projects – with exact measurement results, work processes can be planned and executed purposefully without unnecessary loss of time.
With so-called reference networks we are able to quickly adapt to your specific environment in your production plant, and then capture your individual status quo with less effort.
From a long-term perspective, reference networks offer many benefits. They make it easier to initiate the measurement process for future tasks and thus save a lot of time. E. g. in rolling stands, reference networks are well suited to minimize the recurring expenses of machining operations.
How did the component deform in the course of production? Are the deviations worrying? The comparison of a current measurement with the original CAD model quickly gives precise answers as to whether the production is still within tolerances or whether it requires repair.
Whether setting up a processing machine, checking after a crash, as a routine check or when integrating new machines - with the Laser Tracker or the Laser Scan Arm, parallelism and axes can be determined with millimeter precision and then precisely aligned or adjusted.
A collision or other external influences have led to a deformation of machine parts? If you compare current measurement results with previous reference data, the damaged areas can be precisely identified and then processed in a targeted manner.
The machine is not running smoothly, but you do not know exactly which element is responsible? A measurement of the individual components quickly provides clarity. Such metrological checks using a Laser Tracker or Laser Scan Arm are also suitable for incoming goods inspection.
In particular, large, complex systems can be measured in detail with relatively little effort thanks to the Laser Scanner. For example, these measurement results can be a helpful preparation for the planned relocation of a complete production plant or for future change measures.
A metrological collision investigation in integration processes is an important preparatory process, for example when new machines are integrated into a plant. Thus, not only the ideal location, but also the right path to the factory floor can be reliably determined.
The results of laser scans offer a variety of uses. Among other things, they can serve as a template for any kind of customization. Common examples include custom-made protective covers for transporting sensitive components or custom-made tool boxes.
The measurement of machine components or general components by means of laser scanning forms a precise basis for the digitization of these objects. Thus, optimizations or additional components can first be tested in the digital environment and then efficiently realized on the basis of these findings.
Certain conditions and materials require non-contact inspections. A typical example of this are clean room areas. With the aid of the Laser Scanner for large objects and the Laser Scan Arm for smaller components, necessary inspections can be carried out easily without surface contact.
A typical application of laser metrology is reverse engineering. With our various measuring devices, larger and smaller individual parts can be measured and examined separately in order to better understand the overall system. Even CAD models can be created subsequently.
The combination of various laser scan images can be used to create comprehensive 360-degree tours through entire production facilities. These are suitable, for example, for redevelopment planning. The responsible planning officer can thus comfortably "enter" the 3D system at any time from his desk and save time-consuming on-site visits.
From shipping to petrochemistry – laser metrology has established itself as a state-of-the-art measurement technology in all industries. Therefore, we offer our measurement services across all industrial sectors. Below are a few typical examples.
Whether precise measurements, angled objects or complex 3D scans - with our three flexible measuring laser instruments we are able to fulfill the most diverse measuring tasks in the industry.

Faro Vantage E
Operating range: 25 m
Accuracy: ±20 µm + 5 µm/m
Temp. range: -15 °C – +50 °C
Measurement rate: 1,000 Points/sec
Laser class: 1
Protection class: IP52

Faro Quantum M + Faro Blu HD
Operating range: 3.5 m radial
Accuracy: ±0.110 mm (tactile), ±0.090 mm (contactless)
Temp. range: 10 °C – +40 °C
Frame rate: 300 fps
Scan rate: 2,000 Points/sec
Measurement rate: 600,000 Points/sec
Scan width: max. 150 mm
Laser class: 2

Faro Fokus S 350
Operating range: up to 350 m
Accuracy: ±2.0 mm (> 10 m), ±3.5 mm (> 25 m)
Temp. range: -5 °C – +40 °C
Scan rate: max. 1,000,000 Points/sec
Camera resolution: max. 165 Megapixel
Laser class: 1
Protection class: IP54
We offer industrial metrology in combination with machining services or as a separate service. Just send us a brief description of your request and we will get back to you shortly. You can reach us via contact form or under contact(at)metalock.de.
As part of the MIDROC Metalock Group, we benefit from decades of experience and our international network of highly specialized experts. Due to this expertise and a comprehensive range of services, the Metalock Group has established itself as one of the leading providers of engineering services for all industries around the world.
As the largest company within the METALOCK Group, we at Metalock Germany also offer a wide range of services for any industry and all locations worldwide.
Learn more about Metalock Engineering Germany here